No edit summary |
(I guess?) |
||
| Line 97: | Line 97: | ||
[[Category:Flamewakers]] |
[[Category:Flamewakers]] |
||
| − | [[Category: |
+ | [[Category:Mage characters]] |
[[Category:Molten Core mobs]] |
[[Category:Molten Core mobs]] |
||
| + | [[Category:Bosses]] |
||
Revision as of 22:00, 31 May 2019
 | |||||||
| Race | Flamewaker (Humanoid) | ||||||
| Level | ?? Boss | ||||||
| Reaction | Alliance Horde | ||||||
| Location | Molten Core | ||||||
| Status | Killable | ||||||
| |||||||


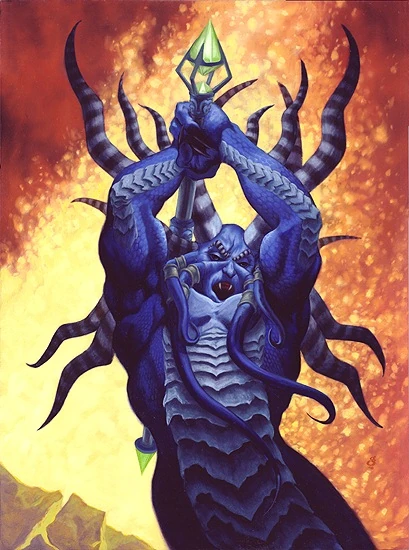
Shazzrah in WoW
Of all the flamewakers who followed Ragnaros into the world of Azeroth, Shazzrah is the most talented in the realm of the arcane. He is aware that his colleague Baron Geddon suspects the elemental Garr of treachery. The conflict between Baron Geddon and Garr suits Shazzrah well, for in fact it is Shazzrah who seeks to posses both halves of the Talisman of Elemental Binding so that he might find a way to siphon its energies for his own use. Ragnaros was very likely aware of his underling's penchant for duplicity when he split the talisman in half and entrusted the pieces to Baron Geddon and Garr.[1]
Shazzrah is an Arcane-based Flamewaker that shares a spawn area with Baron Geddon, guarding the Rune of Mazj.
Attacks and Abilities
 Arcane Explosion — Sends out a blast wave of magic, inflicting 925 to 1075 Arcane damage to nearby enemies. (20 yard range)
- Shazzrah's Curse — Increases the magical damage taken by nearby enemies by 100% for 5 min.
- Magic Grounding — Reduces the magical damage taken by the caster by 50% for 30 sec.
- Counterspell — Counters the spellcasting of nearby enemies, preventing any spell from that school of magic from being cast for 10 sec. Generates a high amount of threat. (AoE with about a 35 yard range)
- Blink — Teleports the caster 20 yd. forward unless something is in the way. Also frees the caster from any bonds. (About every 45 seconds Shazzrah will blink to random target causing a wipe of the threat list)
Strategies
Strategy 1
Shazzrah can be fought in any area that gives a nice 35 yard radius (either the room he patrols or back in Garr's room). The raid is divided into four groups that stand at max range around the main tank. The reason for this layout is to minimize the damage from Shazzrah's arcane explosions whenever he blinks. Each group should consist of several decursers (Mages and Druids) along with an offtank to bring Shazzrah back to the tanking spot. Shazzrah's Curse must be removed immediately by Mages and Druids, starting with the main tank as he's constantly being bombarded by Shazzrah's Arcane Explosion. Since the curse's range is only 35 yards, Druids can stand back 5 more yards and heal the main tanks while focusing on decursing their group without being affected by the curse. Mages can then focus on DPS and be the ones who worry about decursing the main tank. Detect Magic must be kept on him at all times so that his Deaden Magic can be removed ASAP. Only ranged DPS can attack Shazzrah early on. When he gets low enough (around 5-10%), melee DPS can move in to help speed things up.
Strategy 2: A Ranged Fight
The benefits of this method is the ability to apply Mage DPS and mana saved by only one person needing decursing. Position your raid around the lip of Garr's room in a horseshoe with the open end facing the tunnel which leads to the Lava Packs. Shazzrah can be pulled into this room and a Warrior can easily establish initial aggro. After Shazzrah is in position, the raid may wish to spread out in a complete circle, closing the horseshoe. Everyone uses whatever method of ranged damage they have. When he blinks, the targeted player should run towards the Main Tank who will also move to Shazzrah and pull him back into the center. Shaman and priests need to make sure Shazzrah does not have the Deaden Magic buff on him, so it is imperative that mages keep their "Detect Magic" debuff up at all times. When Shazzrah is below 10% of health remaining, all warriors should run in, execute and run back out.
Strategy 3: Paladin Tank
With the new addition of a 40 yard taunt for paladin tanks this fight can be made much easier. First your guild has to have trusted a paladin tank well enough to train them, gear them, and support them in running endgame. Don't think simply having the ranged taunt makes a paladin viable for this position. After that station your raid in a large circle around the tankadin spaced as far apart as possible. Every time he blinks the paladin tank has to run about 5 feet to taunt Shazzrah back to him. Make sure DPS does not start until aggro is firmly back on the paladin. Do not start DPS as soon as the taunt takes place as Paladin taunt only last three seconds and that is NOT enough time for Shazzrah to make it completely back to the middle of the circle. Once he is back in the center and has begun to swing at the paladin with his staff DPS can resume. Healers should be stationed throughout the circle to heal up the people near the blink point. Selecting them manually from their toons can actually work fine since people are spaced out so far. If done right only 2-3 players in the outer circle should be hit by his AE and even then should only be hit once or twice before the taunt pulls Shazzrah back to the center. No taunts of any kind other than the paladins should be used otherwise he will stay at the outer circle and kill most of your raid until the paladin tank can take him back. If used successfully it makes for a much cleaner fight and simplifies the process by a considerable degree.
Reward
| Shazzrah-specific | Shared flamewaker |
|---|---|
|
Shazzrah's death rewards 100 reputation with the Hydraxian Waterlords up to 20,999/21,000 Revered.
Notes
- Shazzrah and Baron Geddon are next to one of the runes that is needed to be doused in order to fight Majordomo.
Quests
- [60R] Hands of the Enemy
Videos
Patch changes
- Patch 1.4.0 (2005-04-19): The Shazzrah encounter in the Molten Core has undergone some changes.
- Patch 1.1.0 (2004-11-07): Added.